Talos Linux – HowTo Create a Kubernetes Cluster in 10 Minutes

Creating and managing a Kubernetes cluster from scratch can be challenging and there’re definitely a way too many possibilities to do so in 2025. With Talos Linux, this can be done in less than 10 minutes!
What is Talos Linux?
Talos Linux is an operating system built specifically for Kubernetes, focusing on security, immutability, and minimalism. It is designed to work across a variety of environments, including cloud platforms, bare metal servers, and virtualization platforms, providing a versatile solution for modern infrastructure needs. One of its key features is that system management is completely API-driven, eliminating the need for traditional SSH, shell access, or a console interface, which enhances both security and ease of automation. Talos is production-ready, having been used to support some of the largest Kubernetes clusters globally. It is an open-source project developed by the team at Sidero Labs, which is committed to simplifying infrastructure management for Kubernetes.
Talos Linux aims to be a highly efficient and secure operating system for managing Kubernetes clusters. Its immutability means that the system is configured in a way that prevents any changes to the operating system after deployment, ensuring that it remains stable and predictable. This makes it ideal for environments where security and consistency are paramount. By focusing on Kubernetes, Talos simplifies the complexities of managing large-scale containerized environments. The API-only management model is particularly appealing for modern DevOps practices, as it enables automation and avoids human error by preventing direct access to the underlying OS. The open-source nature of Talos allows for community contributions and transparency in development, adding to its appeal for enterprises looking for robust, scalable solutions.
Why Talos Linux?
Using Talos Linux to create a Kubernetes cluster offers several compelling reasons compared to other solutions. First, Talos is purpose-built for Kubernetes, designed with a focus on security, immutability, and minimalism. This means that the operating system is highly optimized to run Kubernetes workloads efficiently, without unnecessary overhead. The immutability of Talos ensures that once it’s deployed, the system remains unchanged, which adds a layer of stability and security, as it reduces the risk of unauthorized modifications or human error. Additionally, Talos eliminates the need for traditional access methods like SSH or a console, as all system management is API-driven. This makes automation easier and helps ensure a more secure and streamlined infrastructure, especially in large-scale environments. Talos is production-ready and has proven to support some of the world’s largest Kubernetes clusters, making it a reliable and scalable choice. Furthermore, it works seamlessly across different platforms, including cloud, bare metal, and virtualization, offering flexibility in deployment. Since Talos is open-source, it allows you to have full visibility and control over the system, and you can contribute or customize it to meet specific needs. In short, Talos offers a modern, secure, and efficient solution for managing Kubernetes clusters, especially when you prioritize automation, scalability, and consistency.
How to Create a Kubernetes Cluster?
In this HowTo we will create a simple three node Kubernetes cluster by using Talos v1.9.3 on bare-metal systems. Exactly the same way can also be used for virtualized environments in VMware, Proxmox or XCP-ng environments. During this setup, we will have a single control-plane and two additional worker nodes.
- 10.10.10.230 – control-plane
- 10.10.10.231 – worker node #1
- 10.10.10.232 – worker node #2
Installing Client Tools for Management
First, we need to install the required client tools for further management. This consists of:
- talosctl
- kubectl
Both tools can be easily installed on Linux and macOS. You might also have a look of already packaged versions in your distribution’s software repository or follow this guide:
Linux
curl -sL https://talos.dev/install | sh
curl -LO "https://dl.k8s.io/release/$(curl -L -s https://dl.k8s.io/release/stable.txt)/bin/linux/amd64/kubectl"
MacOS
brew install siderolabs/tap/talosctl
brew install kubectl
Booting the Bare-Metal Nodes
There’re many ways to install Talos on bare-metal nodes (and also VMs). However, the easiest way results into the classic ISO installation. Of course, there’re also other ways like PXE booting and more. Talos’ documentation for bare-metal platforms and virtualized platforms provide additional information and solutions. Take note, that you can run Talos Linux on ADM64 and ARM64 platform.
Downloads
Typically, you will (still) use AMD64 and you can simply download the ISO images from the projects website but just in case, you can also find the ARM64 images right here:
Talos Linux can run on bare-metal and virtualized environments – in both cases you can now simply boot your machine from the ISO image.
Starting

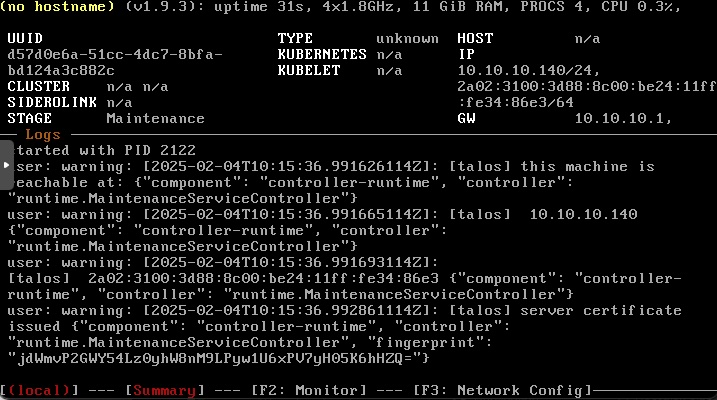
After booting a node from the bare-metal image it will start into the maintenance mode and waiting for a configuration. This configuration can be a control-plane or worker configuration and will be provisioned by the talosctl utility via the API. A newly booted system in the maintenance mode tries to receive an IP address by DHCP for IPv4 and SLACC for IPv6 but you’re not limited to this. Adjusting the network configuration for the personal needs is just blink of an eyelash away and can be quickly done. After configuring all three nodes, we can start provisioning our cluster.
Creating Talos Cluster Config
Having the toolset in place, the basic configuration for the Talos nodes can be created by orchestrating the talosctl utility. Within this example, the cluster will be named gyptazy-dev01 and connects to the node-endpoint 10.10.10.230 and will use the nodes with the addresses 10.10.10.230, 10.10.10.231 & 10.10.10.232. The config files will be written to the directory gyptazy-dev01
talosctl gen config gyptazy-dev01 \
https://10.10.10.230:6443 \
--output-dir ./gyptzazy-dev01 \
--nodes 10.10.10.230,10.10.10.231,10.10.10.232
Note: Take care about the cluster-endpoint. The cluster endpoint does not simply consist of the IP address 10.10.10.230 rather than the full URI string https://10.10.10.230:6443, including the default port 6443.
Adjusting Talos Config
After generating our initial cluster configuration, several config files are being created. If needed, we can adjust the config files for the control-plane and the workers and is often required in complex setups where you also want to specify custom values for the services. For now, we stick to the defaults that were generated and resulted into the following files:
generating PKI and tokens
Created gyptzazy-dev01/controlplane.yaml
Created gyptzazy-dev01/worker.yaml
Created gyptzazy-dev01/talosconfig
However, for further bootstrapping and orchestration we should ensure that the node-endpoint is correctly defined in the talosconfig file. Therefore, we validate that our control-plane is defined as an endpoint. This should look like:
context: gyptazy-dev01
contexts:
    gyptazy-dev01:
        endpoints: ['10.10.10.230']
Deploying Talos Configs to Nodes
There are many ways and also toolings to use and manage your Talos config files, just like your Kubernetes configs. For now, we simply created our configs in a dedicated directory and source them by running the following export command:
export TALOSCONFIG=./gyptzazy-dev01/talosconfigAfterwards, the configs can be applied to the control-plane and worker nodes.
Control-Plane Node

The talosctl command-line tool is used to manage Talos nodes, and the apply-config subcommand specifically applies a configuration file to a given node.
The --insecure flag indicates that the operation is being performed without authentication or encryption, which is generally not recommended in production environments but may be useful during initial setup or troubleshooting.
The --nodes 10.10.10.230 option specifies the target Talos node’s IP address. This tells talosctl which node should receive the configuration.
The --file ./gyptzazy-dev01/controlplane.yaml argument specifies the path to the configuration file that should be applied. This file contains the necessary settings and parameters for the Talos node, such as networking configurations, cluster settings, and role specifications (e.g., control plane or worker node).
When executed, this command pushes the specified configuration file to the Talos node at 10.10.10.230 in an insecure manner, setting up or updating the node’s configuration according to the contents of controlplane.yaml.
talosctl apply-config --insecure --nodes 10.10.10.230 --file ./gyptzazy-dev01/controlplane.yamlWorker Nodes
The command talosctl apply-config --insecure --nodes 10.10.10.231,10.10.10.232 --file ./gyptzazy-dev01/worker.yaml is used to apply a configuration file to multiple Talos Linux nodes simultaneously. Talos is an operating system designed specifically for Kubernetes, and talosctl is the command-line tool used to manage its nodes.
The apply-config subcommand is responsible for pushing a specified configuration file to one or more Talos nodes, ensuring they are set up according to the provided settings.
The --insecure flag means that the operation is performed without authentication or encryption. This is generally used during initial setup or troubleshooting, as secure communication is recommended for production environments.
The --nodes 10.10.10.231,10.10.10.232 option specifies that the configuration should be applied to two specific nodes, identified by their IP addresses. By listing multiple IP addresses separated by a comma, talosctl applies the same configuration to both nodes simultaneously.
The --file ./gyptzazy-dev01/worker.yaml argument points to the local configuration file that contains the settings to be applied. The file worker.yaml is likely configured to define these nodes as worker nodes in a Kubernetes cluster, setting up networking, security, and other parameters required for their role.
When executed, this command pushes the worker.yaml configuration file to both nodes (10.10.10.231 and 10.10.10.232) in an insecure manner, ensuring they are properly configured as worker nodes in the cluster.
talosctl apply-config --insecure --nodes 10.10.10.231,10.10.10.232 --file ./gyptzazy-dev01/worker.yamlBootstrapping the Cluster
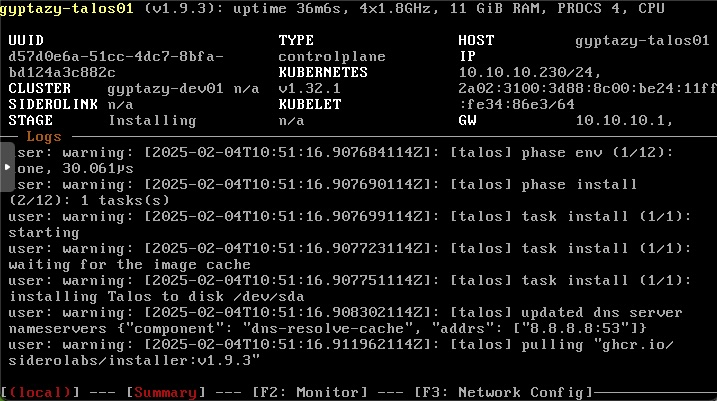
After applying the configurations to the node we need to wait until all systems returned into a healthy state again. Do not perform any actions before!
After the control-plane node became healthy again, it will display the following warning:
[talos] etcd is waiting to join the cluster, if this node is the first node in the cluster, please "talosctl bootstrap' against one of the following IPs:
user: warning: [2025-02-04T11:12:08.311561613Z]: [talos] [10.10.10.230]
We will now start to bootstrap the cluster by executing the bootstrap command to our newly created control-plane node by running the following command:
talosctl bootstrap --nodes 10.10.10.230This may now take a while until everything is completed. We can validate the state by running the following command:
talosctl health --nodes 10.10.10.230This might provide an overview of the current state like:
discovered nodes: ["10.10.10.231" "10.10.10.232" "10.10.10.230"]
waiting for etcd to be healthy: ...
waiting for etcd to be healthy: OK
waiting for etcd members to be consistent across nodes: ...
waiting for etcd members to be consistent across nodes: OK
waiting for etcd members to be control plane nodes: ...
waiting for etcd members to be control plane nodes: OK
waiting for apid to be ready: ...
waiting for apid to be ready: OK
waiting for all nodes memory sizes: ...
waiting for all nodes memory sizes: OK
waiting for all nodes disk sizes: ...
waiting for all nodes disk sizes: OK
waiting for no diagnostics: ...
waiting for no diagnostics: OK
waiting for kubelet to be healthy: ...
waiting for kubelet to be healthy: OK
waiting for all nodes to finish boot sequence: ...
waiting for all nodes to finish boot sequence: OK
waiting for all k8s nodes to report: ...
waiting for all k8s nodes to report: can't find expected node with IPs ["10.10.10.232"]
waiting for all k8s nodes to report: OK
waiting for all control plane static pods to be running: ...
waiting for all control plane static pods to be running: OK
waiting for all control plane components to be ready: ...
waiting for all control plane components to be ready: OK
waiting for all k8s nodes to report ready: ...
waiting for all k8s nodes to report ready: some nodes are not ready: [gyptazy-talos01 gyptazy-talos03]
Looks like we still need to wait… A few minutes later, we can check this again and should finally see within the last line:
waiting for all k8s nodes to report schedulable: OKOur Kubernetes cluster is finally up and running! Congratulations!
Receiving the Kubeconfig
We finally have a Kubernetes cluster running but we also want to orchestrate and use this newly created one. As a result, we need to get our Kubeconfig which can easily be done via talosctl:
talosctl kubeconfig --nodes 10.10.10.230Afterwards, we can simply source this kubeconfig as an export and start running commands by kubectl:
export KUBECONFIG=$(pwd)/kubeconfig
kubectl get nodes
Where we get our usual output returned:
NAME              STATUS   ROLES           AGE     VERSION
gyptazy-talos01   Ready    control-plane   7m13s   v1.32.1
gyptazy-talos02   Ready    <none>          7m20s   v1.32.1
gyptazy-talos03   Ready    <none>          6m54s   v1.32.1
At this point, you can finally start using your Kubernetes cluster as usual.
Conclusion
Talos Linux makes deploying and managing Kubernetes clusters incredibly simple, efficient, and secure. With its minimalistic, immutable, and API-driven approach, Talos eliminates many of the traditional complexities associated with setting up a cluster. In just a few steps, we were able to configure a fully functional Kubernetes environment, proving that Talos is not only easy to use but also highly scalable. Whether you’re working with bare metal, cloud, or virtualized environments, Talos adapts seamlessly, allowing for rapid deployment of even large-scale Kubernetes clusters. The built-in automation, enhanced security, and streamlined configuration process make it a go-to choice for modern infrastructure management. If you’re looking for a reliable, production-ready OS to power your Kubernetes workloads, Talos is definitely worth considering. And if not, a look at one of my virtualization topics, such like Proxmox, XCP-ng, Harvester or bhyve in ClonOS might be a look worth!
